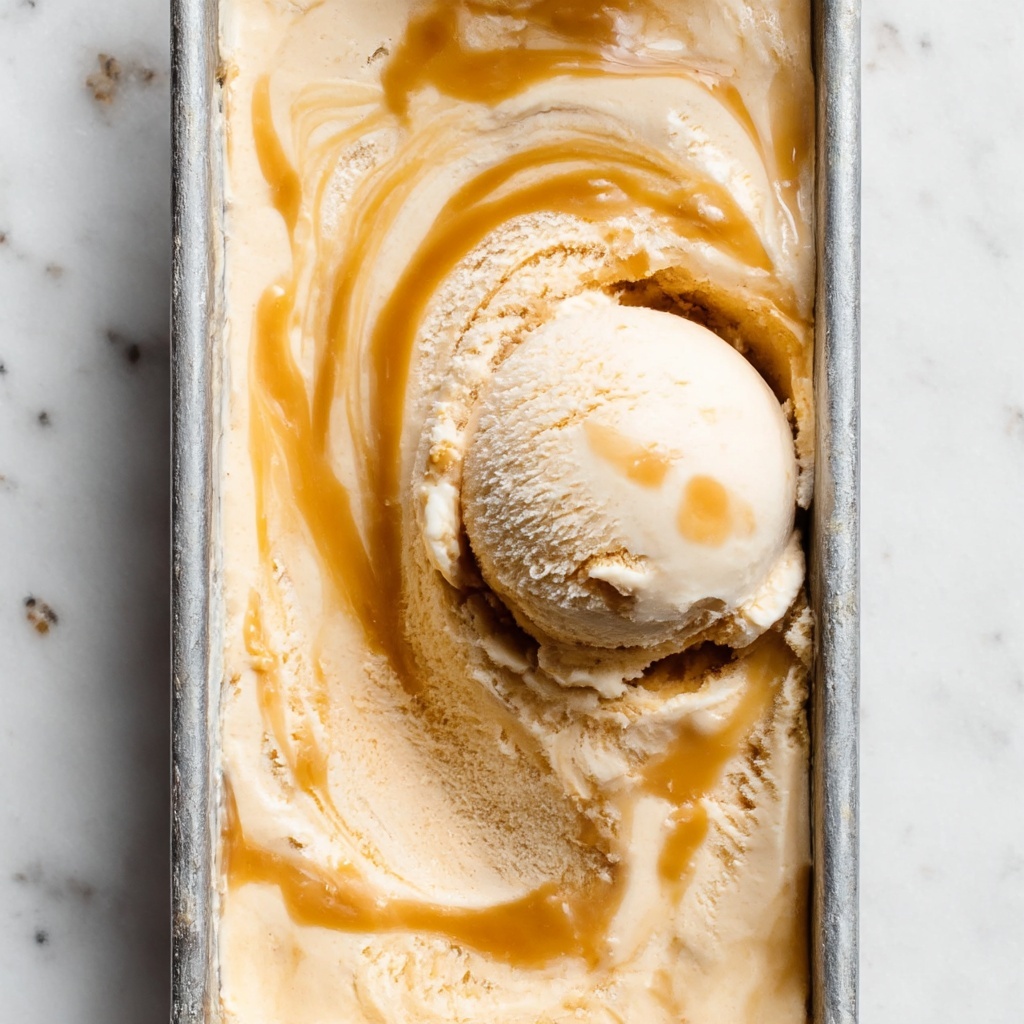
If you have a soft spot for desserts that combine buttery caramel and luscious bananas but want to keep it completely plant-based, this Vegan Banoffee Ice Cream Recipe is about to become your new obsession. Creamy, rich, and packed with the warm, cozy flavors of caramelized bananas and salted caramel swirls, this homemade ice cream is the perfect indulgence for any time of year. Trust me, each spoonful melts beautifully on your tongue, delivering that classic banoffee pie vibe without any dairy or guilt.

Ingredients You’ll Need
This Vegan Banoffee Ice Cream Recipe is wonderfully simple, relying on just a handful of ingredients that come together magically to create a creamy, dreamy dessert. Each element plays a crucial role, from the ripe bananas that bring natural sweetness and smoothness to the rich texture added by coconut custard and sweetened condensed coconut milk. The salted caramel sauce ties everything together with its luscious depth and slight saltiness.
- 4 medium ripe bananas: The star of the show, ripe bananas give natural sweetness and a smooth creamy base when blended.
- 1 tablespoon cooking oil of choice (or vegan butter): Helps caramelize the bananas for an irresistible golden flavor.
- 11.25 oz Sweetened Condensed Coconut Milk: Adds luscious creaminess and sweetness essential for that silky ice cream texture.
- 14 oz Coconut Custard: This boosts richness and gives the ice cream its custard-like body; go for store-bought or homemade.
- 2 teaspoons vanilla extract: Enhances all the flavors with warm, aromatic notes.
- 7 oz Salted Caramel Sauce: The magic finishing touch that adds salty-sweet swirls throughout the ice cream.
How to Make Vegan Banoffee Ice Cream Recipe
Step 1: Caramelize the Bananas
Start by peeling your bananas and slicing them into coins—this makes caramelization even. Heat your cooking oil or vegan butter in a saucepan over medium heat, then add the banana slices with a spoonful of the sweetened condensed coconut milk to help create that caramel glaze. Stir continuously for about 3-4 minutes until the bananas develop a beautiful golden color but don’t let them burn. This step brings out a deep, rich flavor that makes this recipe standout.
Step 2: Blend Your Ice Cream Base
Once your bananas are perfectly caramelized, it’s time to transfer them to your blender. Add the remaining sweetened condensed coconut milk, coconut custard, and vanilla extract. Blend everything until completely smooth. You’ll notice the mixture is beautifully creamy with that natural sweetness shining right through—this is your luscious ice cream base ready for the next step.
Step 3: Churn the Ice Cream
Pour your blended mixture into your ice cream maker and churn according to your machine’s instructions. For me, this usually takes about 30 to 40 minutes. The churning introduces air and helps create that perfect scoopable texture, transforming it from a liquid blend into creamy frozen delight.
Step 4: Fold in the Salted Caramel Sauce
Once the ice cream is churned, switch off your machine and gently fold in about two-thirds of the salted caramel sauce. Folding instead of mixing vigorously keeps those gorgeous caramel ribbons intact, giving you pockets of gooey sweetness in every bite.
Step 5: Freeze and Swirl
Transfer your ice cream into a loaf pan lined with parchment paper—the edges make it easy to lift out later. Swirl the remaining salted caramel sauce on top in a beautiful pattern. Cover tightly and freeze for a minimum of 2 hours to let it firm up to the perfect scoopable consistency.
Step 6: Serve and Enjoy!
When you’re ready to indulge, take the ice cream out of the freezer about 15 minutes beforehand to soften slightly. This little thaw makes scooping easier and lets the flavors really shine.
How to Serve Vegan Banoffee Ice Cream Recipe
Garnishes
A scoop of this Vegan Banoffee Ice Cream Recipe is fantastic on its own, but you can take it next level with a few garnishes. Try topping with some crushed vegan biscuits or granola for crunch, a sprinkle of toasted coconut flakes for extra tropical flair, or a drizzle of warm salted caramel sauce.
Side Dishes
This ice cream pairs beautifully with fresh fruit like sliced strawberries or juicy mango, or alongside a warm vegan chocolate brownie for a decadent dessert platter. For something lighter, a crisp cookie or biscotti adds a nice texture contrast without overwhelming the flavors.
Creative Ways to Present
Serving this Vegan Banoffee Ice Cream Recipe in mini waffle cones or edible coconut bowls turns it into a fun, portable treat for parties or picnics. Alternatively, use it as a luscious filling between vegan shortcake layers or dollop it atop a warm banana bread slice for a show-stopping dessert.
Make Ahead and Storage
Storing Leftovers
If you have any leftovers, store your Vegan Banoffee Ice Cream in an airtight container in the freezer. Keep it tightly sealed to prevent ice crystals and to preserve the creamy texture and rich flavors. It will stay fantastic for up to 3-4 days, so you can enjoy it fresh and delicious.
Freezing
This recipe freezes wonderfully. After the initial 2-hour freeze post-preparation, your ice cream will hold up well for 3-4 days. When frozen longer, it might get a little firmer, so just let it soften for 10-15 minutes before serving.
Reheating
Since this is an ice cream, reheating isn’t recommended. Instead, allow your leftovers to thaw slightly at room temperature for best texture and flavor before scooping and serving.
FAQs
Can I make this Vegan Banoffee Ice Cream Recipe without an ice cream maker?
Absolutely! You can pour the blended mixture into a shallow container, freeze it, and stir vigorously every 30 minutes for a few hours to mimic the churning process. It won’t be quite as smooth as machine-churned, but still delicious.
What can I substitute for sweetened condensed coconut milk?
If you can’t find sweetened condensed coconut milk, you can make your own by simmering canned coconut milk with sugar until thickened, or use another plant-based condensed milk alternative, but the flavor might vary slightly.
Is the salted caramel sauce store-bought or homemade in this recipe?
You can use either! The recipe suggests Nature’s Charm brand as a convenient option, but homemade vegan salted caramel sauce made from coconut sugar, coconut milk, and salt works beautifully too.
How ripe should the bananas be?
The riper the bananas, the better! Look for bananas with plenty of brown spots—they will blend into the creamiest, sweetest base, essential for that authentic banoffee flavor.
Can I make this recipe nut-free?
Yes, this recipe is naturally nut-free as it uses coconut-based ingredients. Just double-check your salted caramel sauce and other store-bought items to ensure they meet your allergy needs.
Final Thoughts
I can’t recommend this Vegan Banoffee Ice Cream Recipe enough if you’re looking for a show-stopping, dairy-free dessert that’s both comforting and elegant. It’s simple to make, utterly delicious, and perfect for sharing (or not!). So grab those bananas, fire up your ice cream maker, and treat yourself to this unforgettable sweet delight—you won’t regret it!
Print
Vegan Banoffee Ice Cream Recipe
- Prep Time: 15 minutes
- Cook Time: 10 minutes
- Total Time: 2 hours 45 minutes
- Yield: 6 servings
- Category: Dessert
- Method: Stovetop
- Cuisine: Vegan
- Diet: Vegan
Description
This Vegan Banoffee Ice Cream is a creamy, dairy-free dessert combining the rich flavors of caramelized bananas, coconut custard, and salted caramel sauce. Made with wholesome plant-based ingredients, this indulgent ice cream offers a delightful twist on the classic banoffee pie in a refreshing frozen form, perfect for vegan and dairy-free diets.
Ingredients
Banana Caramel
- 4 medium ripe bananas
- 1 tablespoon cooking oil of choice (or vegan butter)
- 1 tablespoon sweetened condensed coconut milk
Ice Cream Base
- 11.25 oz Sweetened Condensed Coconut Milk (Nature’s Charm recommended)
- 14 oz Coconut Custard (Nature’s Charm or homemade)
- 2 teaspoons vanilla extract
Toppings and Swirls
- 7 oz Salted Caramel Sauce (Nature’s Charm recommended)
Instructions
- Prepare the Bananas: Peel the bananas and slice them into coins to ensure even caramelization and blend smoothly in the ice cream base.
- Caramelize the Bananas: Heat the cooking oil in a saucepan over medium heat. Add the sliced bananas and about one tablespoon of sweetened condensed coconut milk. Cook for 3-4 minutes while continuously tossing to lightly caramelize the bananas without burning.
- Blend the Ice Cream Mixture: In a blender, combine the caramelized banana mixture, remaining sweetened condensed coconut milk, coconut custard, and vanilla extract. Blend for about a minute until the mixture is smooth and creamy.
- Churn the Ice Cream: Pour the blended mixture into an ice cream maker and churn according to the manufacturer’s instructions, approximately 30-40 minutes, until it reaches a soft-serve consistency.
- Fold in Caramel Sauce: Turn off the ice cream maker and gently fold in about two-thirds of the salted caramel sauce to create luscious ribbons throughout the ice cream.
- Freeze the Ice Cream: Transfer the mixture to a loaf pan lined with parchment paper. Swirl the remaining salted caramel sauce on top for an attractive finish. Cover and freeze for a minimum of 2 hours to set completely.
- Serve: Remove the ice cream from the freezer about 15 minutes before serving to allow it to soften slightly, making it easier to scoop and enjoy the creamy, flavorful dessert.
Notes
- You can substitute the cooking oil with vegan butter for a richer flavor.
- Ensure your ice cream maker bowl is well-frozen before churning for best results.
- For homemade coconut custard, use coconut milk thickened with a vegan-friendly starch.
- Let the ice cream thaw slightly before scooping to get the best texture.
- This recipe can be customized with nuts or vegan chocolate chips for extra texture.


