
If you want a dessert that steals the show every time, look no further than this Colorful Poke Cake Recipe for Parties and Birthdays Recipe. It’s vibrant, festive, and wonderfully moist thanks to the delightful gelatin infusion that creates pockets of fruity flavor in every bite. Whether it’s a celebration or a casual get-together, this cake brings together simplicity, fun colors, and incredible taste in one unforgettable dish that everyone will ask for again and again.
Ingredients You’ll Need
Ingredients You’ll Need
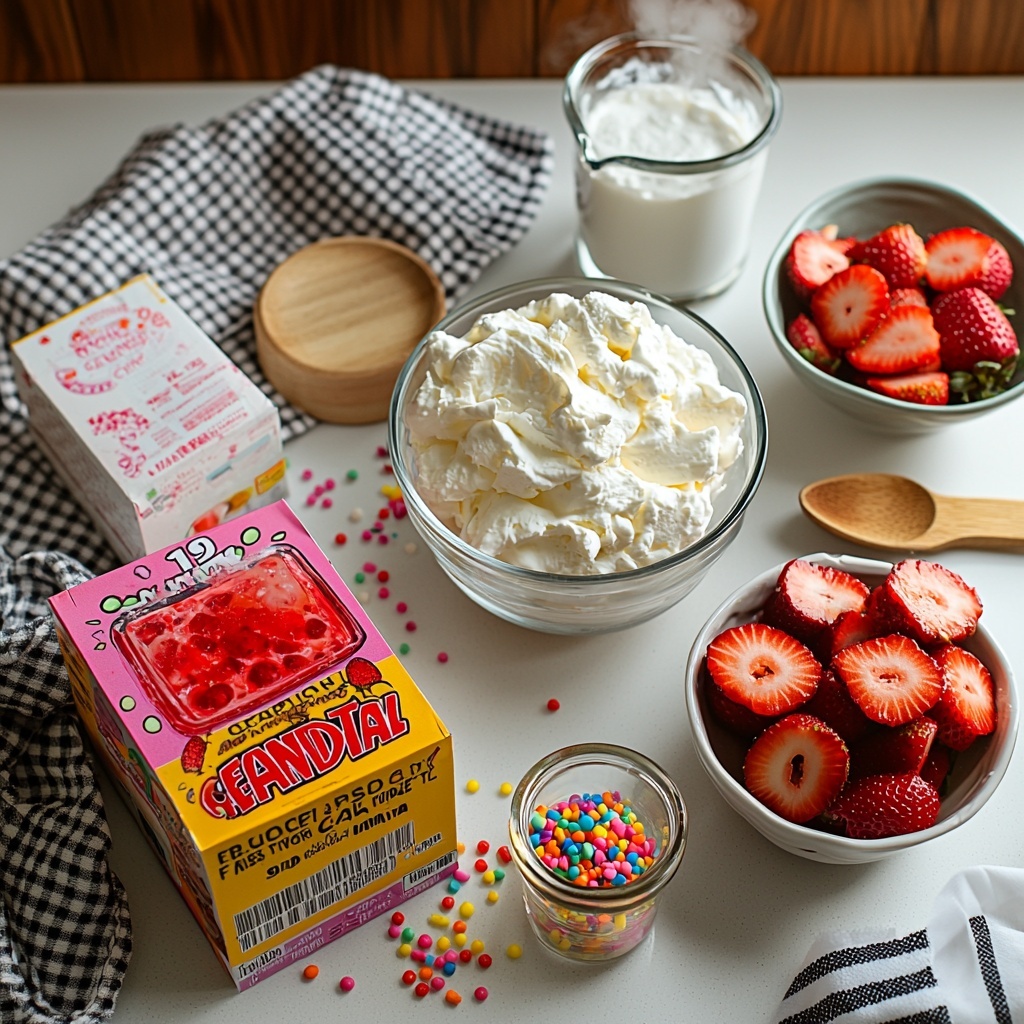
Gathering the ingredients for this Colorful Poke Cake Recipe for Parties and Birthdays Recipe is both simple and rewarding. Each component plays a role—from the light cake base to the juicy fruit toppings—that guarantees the perfect balance of texture and excitement.
- White or yellow cake mix: The foundation for a soft, fluffy cake that bakes evenly every time.
- Flavored gelatin (3 oz): Adds vibrant color and a sweet, fruity punch that soaks into the cake’s pores.
- Boiling water (1 cup): Necessity for dissolving the gelatin completely to infuse the cake beautifully.
- Cold water (1/2 cup): With the hot water, it cools the gelatin so it’s perfect for pouring without melting the cake.
- Whipped topping (8 oz tub): Creates an airy, cloud-like frosting that lightens every slice.
- Fresh or crushed fruit (1 cup): Adds freshness and a burst of natural sweetness, plus gorgeous color on top.
- Sprinkles or colored sugar: For that festive spark that screams birthday celebration.
- Optional add-ins: Vanilla extract, citrus zest, or a splash of flavored syrup to elevate the flavor complexity.
How to Make Colorful Poke Cake Recipe for Parties and Birthdays Recipe
Step 1: Preheat and Prepare Your Pan
Start strong by preheating your oven according to the cake mix directions and greasing a 9×13-inch pan. This size is ideal because it makes poking the cake easier and allows for perfect serving sizes. Giving your pan a good grease ensures your cake won’t stick and will come out flawlessly.
Step 2: Mix and Bake the Cake
Follow the cake mix instructions exactly, but feel free to stir in a teaspoon of vanilla or a pinch of lemon zest for an extra flavor kick. Pour your batter evenly into the prepared pan and bake until a toothpick inserted comes out clean. This usually takes about 25 to 30 minutes. The aroma at this point is going to be irresistible!
Step 3: Cool Slightly Before Poking
Once out of the oven, let your cake rest for 15 to 20 minutes so it’s warm but not hot. This perfect warmth allows it to absorb the gelatin without getting mushy or falling apart. Patience here really pays off in the final texture!
Step 4: Poke the Cake Holes
Using the handle of a wooden spoon or a sturdy straw, poke holes about one inch apart all over the surface of the cake. You want to go deep enough to reach near the bottom but be gentle not to pierce through entirely. These holes are the secret spots where the gelatin syrup will settle to add bursts of flavor.
Step 5: Prepare the Gelatin Mixture
In a mixing bowl, dissolve your flavored gelatin into the boiling water, whisking constantly until there’s no powder left. Then stir in the cold water to cool it down to the ideal temperature. Your gelatin needs to be warm enough to be liquid but not hot enough to melt or damage the cake.
Step 6: Pour the Gelatin Over the Cake
Slowly and carefully pour the gelatin mixture over the cake, focusing mainly on the holes so the liquid seeps deep inside. Don’t worry—it looks like a lot of liquid, but your cake will soak it up beautifully, transforming from plain to spectacular with vivid color and juicy flavor pockets.
Step 7: Chill Until Set
Cover your cake and place it in the refrigerator for at least two hours. This chilling step is crucial because it allows the gelatin to set firmly, locking in all those wonderful fruity bursts for a moist cake that tastes as good as it looks.
Step 8: Add the Whipped Topping
Spread your whipped topping or fresh whipped cream evenly over the set cake. This creamy layer adds luxurious lightness that balances the sweetness and keeps every slice soft and appealing. Use thawed whipped topping for ease or homemade whipped cream if you want to impress.
Step 9: Decorate with Fruit and Sprinkles
This step is where your cake turns into a party centerpiece. Scatter your preferred fresh fruit—strawberries are classic but feel free to experiment with raspberries, peaches, or pineapple. Add sprinkles or colored sugar to give that extra dash of celebration-ready sparkle without overwhelming the cake’s neat slices.
Step 10: Final Chill and Serve
Pop the cake back into the fridge for another 30 minutes to set the topping. When you slice it, clean your knife between cuts for beautifully clean edges. Serve chilled for the best texture and flavor experience that will delight every guest.
How to Serve Colorful Poke Cake Recipe for Parties and Birthdays Recipe
Garnishes
Enhance the already eye-catching cake with a touch of extra charm. Fresh mint leaves add a pop of green and a hint of aroma that complements the fruit. Tiny edible flowers or extra sprinkles also make the cake feel extra special, perfect for birthdays or celebratory vibes.
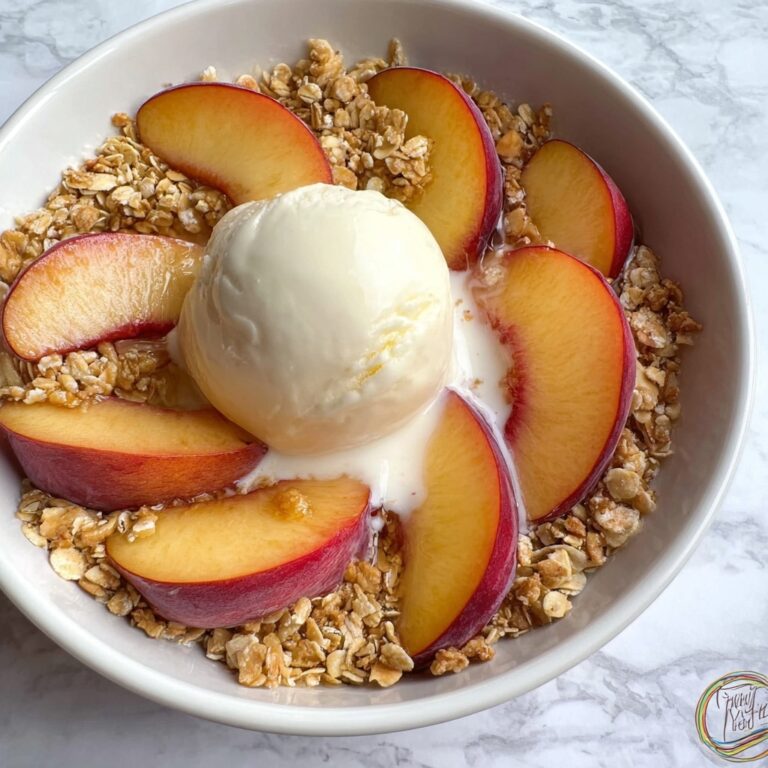
Side Dishes
Pair your colorful poke cake with light accompaniments like a bowl of fresh berries or a scoop of vanilla ice cream. These sides balance the sweetness and add contrasting textures without overpowering the cake’s vibrant flavors.
Creative Ways to Present
For an exciting twist, serve the cake in individual glass cups to showcase the colorful layers through the sides. You can also make bite-sized mini versions in cupcake liners, sprinkled with glittery sugar, to pass around at parties. Presentation is part of the fun, and this recipe lends itself beautifully to playful serving ideas.
Make Ahead and Storage
Storing Leftovers
Keep your leftover poke cake covered tightly in the refrigerator. It stays moist and fresh for up to 4 days—just be sure to guard against absorbing other fridge odors by wrapping it well or storing it in an airtight container.
Freezing
This cake freezes best without the whipped topping. Wrap it securely in plastic wrap and aluminum foil to prevent freezer burn. When ready to enjoy, thaw overnight in the fridge and then add fresh whipped topping and garnishes before serving.
Reheating
This is a cake best enjoyed cold, so reheating is not recommended. The gelatin filling gives it such a refreshing, moist texture that’s perfect straight from the fridge, making it a cool treat no matter the season.
FAQs
Can I use other flavors of gelatin?
Absolutely! While strawberry is classic, you can use cherry, raspberry, or even tropical flavors like pineapple to customize your Colorful Poke Cake Recipe for Parties and Birthdays Recipe to suit your taste or theme.
What if I don’t have a boxed cake mix?
You can bake your favorite homemade white or yellow cake from scratch if you prefer. Just ensure your batter is smooth and the cake bakes evenly to mimic the texture that best soaks up the gelatin.
Can I use fresh fruit instead of frozen or canned?
Fresh fruit is highly recommended for the best flavor and texture. Fruits like strawberries and raspberries work beautifully both inside and as a topping, providing freshness and a natural vibrancy to the cake.
Is this cake gluten-free?
Typically, boxed cake mixes contain gluten, but you can find gluten-free cake mixes that work well for this recipe. Just substitute accordingly to keep the recipe inclusive without losing the magic.
Can I make this cake ahead of time for an event?
Yes! This Colorful Poke Cake Recipe for Parties and Birthdays Recipe actually benefits from chilling for a few hours or overnight. It’s a fantastic make-ahead dessert that stays moist and flavorful, making your party prep smoother.
Final Thoughts
There’s something truly joyful about the pop of color and burst of flavor hidden inside every slice of this Colorful Poke Cake Recipe for Parties and Birthdays Recipe. It’s not just a cake—it’s a celebration on a plate that’s easy to pull together and even easier to fall in love with. So go ahead, bring this beauty to your next gathering and watch the smiles grow as everyone digs in!
Print
Colorful Poke Cake Recipe for Parties and Birthdays Recipe
- Prep Time: 20 minutes
- Cook Time: 30 minutes
- Total Time: 3 hours 15 minutes
- Yield: 12 servings
- Category: Dessert
- Method: Baking
- Cuisine: American
Description
This Best Poke Cake recipe is a delightful and colorful dessert perfect for parties and birthdays. Made with a moist white or yellow cake base, it is infused with flavored gelatin for vibrant taste and topped with whipped cream and fresh fruit, creating a crowd-pleasing treat that’s easy to prepare and visually stunning.
Ingredients
Cake
- 1 box white or yellow cake mix (plus the eggs, oil, and water listed on the box)
- 1 teaspoon vanilla extract (optional)
- Pinch of lemon zest (optional)
Gelatin Mixture
- 1 (3 oz) box flavored gelatin (strawberry, cherry, or raspberry)
- 1 cup boiling water
- 1/2 cup cold water
Topping
- 1 (8 oz) tub whipped topping, thawed (or 3 cups fresh whipped cream)
- 1 cup crushed or sliced fruit (strawberries, raspberries, peaches, or pineapple)
- Sprinkles or colored sugar for garnish
Instructions
- Preheat and prepare the pan: Heat your oven according to the cake mix directions. Grease a 9×13-inch baking pan to ensure the cake doesn’t stick and will be easy to poke and serve.
- Mix and bake the cake: Prepare the cake batter as directed on the box. For extra flavor, add 1 teaspoon vanilla extract or a pinch of lemon zest. Pour the batter into the prepared pan and bake for 25–30 minutes or until a toothpick inserted into the center comes out clean.
- Cool slightly: Allow the cake to cool for 15–20 minutes until warm but not hot. This helps the cake retain its shape while still absorbing the gelatin efficiently.
- Poke the holes: Using the handle of a wooden spoon or a thick straw, poke holes all over the cake approximately 1 inch apart, going deep without piercing the bottom. Wipe the spoon or straw if it gets sticky for clean holes.
- Make the gelatin: In a mixing bowl, whisk the gelatin powder with 1 cup boiling water until completely dissolved. Stir in 1/2 cup cold water, ensuring the mixture is warm and pourable but not hot.
- Pour the gelatin: Slowly and evenly pour the gelatin mixture over the cake, focusing on filling the holes. This allows each slice to be colorful and flavorful; the liquid quantity may seem large, which is normal.
- Chill and set: Cover the cake and refrigerate for at least 2 hours, allowing the gelatin to fully set and the cake to cool completely.
- Add the topping: Spread the thawed whipped topping evenly over the set gelatin. Alternatively, you can make a richer topping by beating 1 1/4 cups cold heavy cream with 2 tablespoons powdered sugar until soft peaks form and then spread it on.
- Finish with fruit and sprinkles: Scatter your choice of sliced fruit like strawberries over the cake and add sprinkles for a festive appearance, keeping the toppings balanced to allow neat slicing.
- Chill again, then slice: Refrigerate the cake for an additional 30 minutes to set the topping firmly. Use a clean knife between slices for tidy edges and serve chilled.
Notes
- You can substitute whipped topping with fresh whipped cream for a richer texture.
- Use different flavored gelatin powders to change the flavor and color of the cake.
- Adding vanilla extract or citrus zest to the cake batter enhances flavor depth.
- Ensure the cake is warm but not hot before poking holes to prevent breaking.
- Chilling times are crucial for proper gelatin setting and slicing.
- Be gentle when pouring the gelatin mixture to avoid breaking the cake structure.


