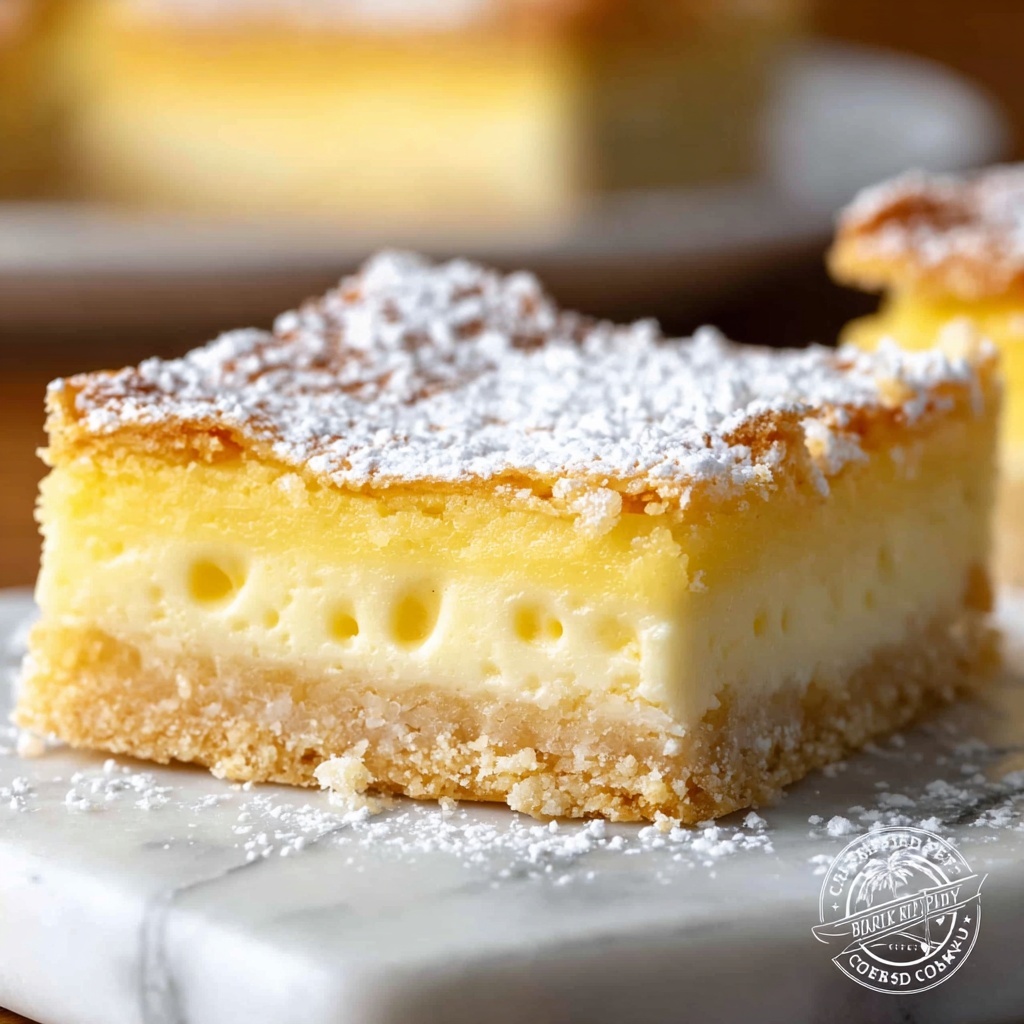
If you have a sweet tooth but want something fuss-free and utterly delightful, this No-Bake Custard Slice Recipe is your new best friend. Imagine layers of crisp biscuits sandwiched between luscious, creamy custard, topped with a smooth, sweet icing that sets perfectly in the fridge without any baking involved. It’s an absolute showstopper for afternoon tea, casual family get-togethers, or whenever you’re craving a nostalgic, comforting dessert that is both simple and stunning.
Ingredients You’ll Need
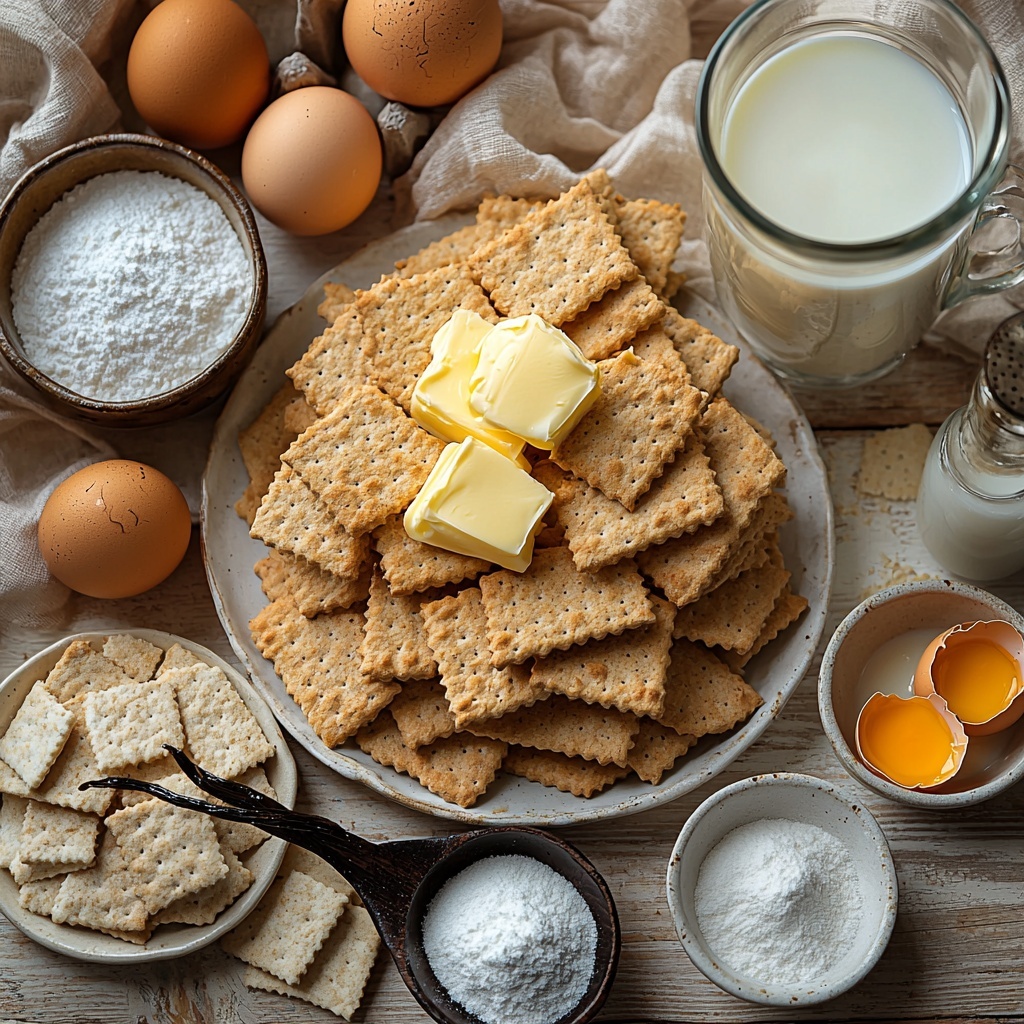
Every ingredient in this No-Bake Custard Slice Recipe plays a key role in delivering that perfect harmony of textures and flavors. From the crunchy biscuits that create the structure, to the creamy custard filling and the sweet icing on top, each component is straightforward yet indispensable for this classic treat.
- 2 packs plain graham crackers or digestive biscuits (or vanilla wafers): Choose your favorite crunchy base; they soften just enough under the custard.
- 4 cups milk: The creamy foundation for the custard, providing richness and depth.
- 1/2 cup sugar: Sweetens the custard perfectly without overpowering it.
- 1/3 cup cornstarch: Thickens the custard to that indulgent, spoonable texture you crave.
- 2 tsp vanilla extract: Adds a warm, fragrant note that elevates the custard’s flavor.
- 3 egg yolks: Give the custard a silky richness and help with thickening when cooked.
- 2 tbsp butter: Enriches the custard and lends a velvety finish.
- 1 cup powdered sugar: Used to make the smooth, sweet icing on top.
- 1-2 tbsp milk: Adjust for the perfect icing consistency, balancing thickness and spreadability.
- 1/2 tsp vanilla: Infuses the icing with subtle flavor, tying everything together.
How to Make No-Bake Custard Slice Recipe
Step 1: Prepare the Pan and Biscuit Base
Line an 8 by 8 or 9 by 9 square pan with parchment paper – this step makes removing the slice later so much easier. Arrange a single layer of your chosen biscuits across the bottom to form a firm, even base that will soak up the custard just right.
Step 2: Make the Custard
In a saucepan, whisk together the milk, sugar, and cornstarch until you have a smooth mixture with no lumps. Place the pan over medium heat and stir constantly to prevent sticking. Once the mixture is hot, slowly add the egg yolks while whisking vigorously to avoid scrambling—they enrich the custard with their creamy texture.
Step 3: Thicken the Custard
Keep stirring the custard on medium heat for about 5 to 7 minutes until it thickens into a luscious, pudding-like consistency. Once thick, remove from heat and immediately stir in the butter and vanilla extract. The butter will melt in smoothly, adding that extra luxurious richness, while the vanilla brings out aromatic warmth.
Step 4: Layer It Up
Pour half of the warm custard over the first biscuit layer, spreading it evenly. Top this with another layer of biscuits to create a beautiful custard-biscuit sandwich. Pour over the remaining custard, then finish by topping the slice with a final biscuit layer to close the dessert.
Step 5: Prepare and Spread the Icing
Mix together powdered sugar, 1 to 2 tablespoons of milk (adjusting for the right consistency), and vanilla until smooth and spreadable. This icing adds a delicate sweetness and a smooth finish. Spread it evenly over the top biscuit layer, covering every nook and cranny.
Step 6: Chill and Set
Pop the entire pan into the fridge and chill for at least 4 hours, although letting it chill overnight is ideal. This resting time allows the biscuits to soften to just the right texture while the custard fully sets into a sliceable delight.
How to Serve No-Bake Custard Slice Recipe
Garnishes
Simple garnishes like a light dusting of cocoa powder, a sprinkle of shredded coconut, or a few fresh berries on top can elevate the presentation without overwhelming the custard’s delicate flavor. Whipped cream on the side also adds a lovely lightness.
Side Dishes
This custard slice pairs beautifully with a cup of strong black tea or a rich coffee, balancing the sweetness perfectly. For a special touch, serve alongside fresh fruit salad or a tart berry compote to add contrast.
Creative Ways to Present
Try cutting the custard slice into elegant little squares or finger-sized bars for parties. Layer some thinly sliced strawberries inside for a fruity twist, or drizzle with a little melted chocolate just before serving for an indulgent flair that friends and family will adore.
Make Ahead and Storage
Storing Leftovers
Keep any leftovers covered tightly in the refrigerator for up to 3 to 4 days. This ensures the custard maintains its creamy texture while the biscuits stay deliciously soft but not soggy.
Freezing
While this No-Bake Custard Slice Recipe tastes best fresh or chilled, you can freeze leftovers wrapped well in plastic wrap and foil for up to 1 month. Thaw overnight in the fridge before serving to preserve texture and flavor.
Reheating
Since this dessert is served chilled, reheating is not recommended. Instead, allow it to come to room temperature for about 10-15 minutes if you prefer less chill, then enjoy it creamy and cool.
FAQs
Can I use other types of biscuits instead of graham crackers or digestive biscuits?
Absolutely! Vanilla wafers or any plain, lightly sweet biscuits work wonderfully. Just avoid overly sweet or crumbly varieties as they might alter the texture and balance.
Why does the custard need to be cooked on medium heat while whisking?
Cooking on medium heat with constant stirring prevents lumps and stops the egg yolks from scrambling, ensuring a silky smooth and thickened custard.
Can I make this dessert vegan or dairy-free?
It’s a bit tricky, as eggs and dairy milk are central here, but you could try dairy-free milk alternatives and cornstarch-based custard substitutes. Vegan egg replacers might work, but the texture and flavor will differ from the classic recipe.
How long should I chill the custard slice for the best results?
Chilling for at least 4 hours is the minimum to let the layers set properly, but overnight chilling gives you the firmest, most delicious slice that slices neatly and tastes incredible.
Is there a way to make the icing less sweet or substitute it?
You can reduce the powdered sugar slightly or swap the icing for a thin spread of whipped cream or a light dusting of powdered sugar if you prefer a less sweet topping, though the icing adds that perfect finishing touch.
Final Thoughts
You really can’t go wrong with this No-Bake Custard Slice Recipe. It’s straightforward, comforting, and wonderfully indulgent without requiring the oven or complicated techniques. Give it a whirl and watch it become your go-to for a sweet treat that looks impressive yet feels like a warm hug in every bite.
Print
No-Bake Custard Slice Recipe
- Prep Time: 20 minutes
- Cook Time: 15 minutes
- Total Time: 4 hours 35 minutes (including chilling time)
- Yield: 9 servings
- Category: Dessert
- Method: Stovetop
- Cuisine: Western
Description
This No-Bake Custard Slice is a delightful layered dessert featuring crispy biscuits and a creamy homemade custard topped with a smooth vanilla icing. Quick to prepare with no oven needed, it’s perfect for a refreshing treat that sets up in the fridge for several hours, delivering a rich and nostalgic flavor in every bite.
Ingredients
Base Layers
- 2 packs plain graham crackers or digestive biscuits (or vanilla wafers)
Custard Filling
- 4 cups milk
- 1/2 cup sugar
- 1/3 cup cornstarch
- 2 tsp vanilla extract
- 3 egg yolks
- 2 tbsp butter
Vanilla Icing
- 1 cup powdered sugar
- 1–2 tbsp milk
- 1/2 tsp vanilla extract
Instructions
- Prepare the Pan: Line an 8×8 or 9×9 square pan with parchment paper to prevent sticking and ease removal of the custard slice later.
- First Biscuit Layer: Arrange a layer of biscuits to completely cover the bottom of the lined pan, creating a firm base for the custard.
- Mix Custard Ingredients: In a saucepan, whisk together the milk, sugar, and cornstarch until the mixture is smooth and free of lumps, ensuring even cooking.
- Cook Custard Base: Heat the mixture over medium heat while stirring constantly to prevent burning. Once the mixture is hot, slowly whisk in the egg yolks to enrich the custard.
- Thicken Custard: Keep stirring until the custard thickens sufficiently, about 5 to 7 minutes. This step ensures a creamy and stable filling.
- Finish Custard: Remove the saucepan from heat and immediately stir in the butter and vanilla extract until both are fully incorporated, adding richness and flavor.
- Add First Custard Layer: Pour half of the prepared custard evenly over the biscuit layer in the pan.
- Second Biscuit Layer: Place another layer of biscuits on top of the custard to build the dessert’s characteristic layered look.
- Add Second Custard Layer: Pour the remaining custard over the second biscuit layer, spreading it evenly.
- Top Biscuit Layer: Finish by arranging a final layer of biscuits over the custard to seal the dessert.
- Prepare Vanilla Icing: Mix together the powdered sugar, 1 to 2 tablespoons of milk, and vanilla extract until smooth to create a light, sweet topping.
- Apply Icing: Spread the vanilla icing evenly over the top layer of biscuits for a beautiful finish and added sweetness.
- Chill: Place the pan in the fridge and chill for at least 4 hours, preferably overnight, to let the custard set and flavors meld.
- Serve: Remove the custard slice from the pan, slice into squares, and serve chilled for the best texture and taste experience.
Notes
- Use parchment paper for easy removal and clean edges.
- Stir constantly while cooking custard to prevent lumps and burning.
- Overnight chilling enhances the dessert’s texture and flavor meld.
- Adjust the icing milk quantity to achieve desired consistency.
- This dessert should be kept refrigerated and consumed within 2-3 days.


