
“`html
If you have a sweet tooth and love creamy, luscious desserts that come together without heating up the oven, then you have to try this Oreo No-Bake Cheesecake Cups Recipe. These little delights are the perfect blend of crunchy Oreo cookie crumbles and smooth, dreamy cheesecake filling, all layered in charming individual cups. They are refreshingly light yet wonderfully satisfying, making them an instant favorite for gatherings, quick treats, or anytime you crave a decadent dessert without the fuss.
Ingredients You’ll Need
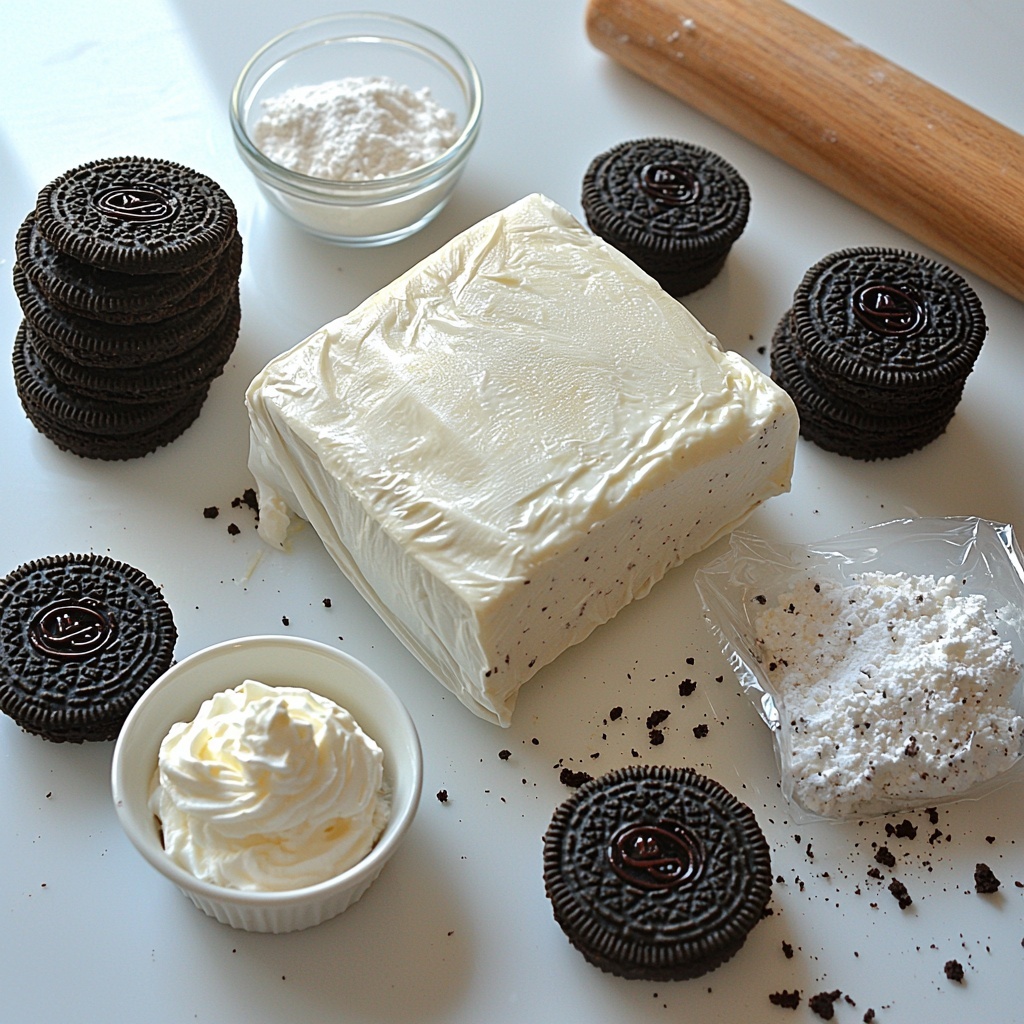
This Oreo No-Bake Cheesecake Cups Recipe is delightfully simple, using just a handful of ingredients that each play an essential role in the flavor and texture. From the rich cream cheese that provides a silky base, to the airy whipped topping that adds lightness, every component contributes to making this dessert irresistibly delicious.
- 1 8 oz block of cream cheese, softened: The creamy, tangy heart of your cheesecake filling for smooth richness.
- 1 8 oz. Cool Whip or whipped topping: Adds a fluffy, light texture that balances the dense cream cheese.
- 2/3 cup powdered sugar: Sweetens the cheesecake filling while keeping it smooth and silky.
- 1 teaspoon vanilla: Infuses a warm, aromatic flavor that elevates the overall taste.
- 24-26 Oreo cookies (more as desired): Crushed to create that signature chocolate crunch base and mix-in throughout.
How to Make Oreo No-Bake Cheesecake Cups Recipe
Step 1: Crush and Layer the Oreos
Start by sealing the Oreo cookies in a plastic bag, then crush them with a rolling pin or wooden spoon until they’re in small, crunchy pieces. Spoon about 1 1/2 to 2 tablespoons of these crushed Oreos into the bottom of six small dessert cups (make sure they hold at least 3/4 to 1 cup). This crunchy base adds a beautiful texture contrast to the creamy filling.
Step 2: Whip the Cheesecake Filling
Using a hand mixer or stand mixer, blend the softened cream cheese and powdered sugar until perfectly smooth and creamy. Add the vanilla extract, mixing it in to infuse those sweet, comforting notes. Then, gently fold in the Cool Whip, carefully combining to keep the filling light and airy.
Step 3: Incorporate More Crushed Oreos
Fold the remaining crushed Oreos into the whipped cheesecake mixture, ensuring each bite has bursts of cookie crumbles. This step is crucial because it adds pockets of Oreo crunch throughout, making every spoonful a little adventure in texture.
Step 4: Assemble and Chill
Evenly divide the cheesecake filling over the Oreo bases in each cup and gently press down. Place the cups in the fridge to chill for about an hour. This chilling time allows the cheesecake filling to set slightly, marrying the flavors and giving you that melt-in-your-mouth feel you’re craving.
Step 5: Top and Enjoy
Just before serving, dollop some whipped cream on top and sprinkle with a little extra crushed Oreo for added flair and crunch. Then dig in and delight in every creamy, crumbly bite!
How to Serve Oreo No-Bake Cheesecake Cups Recipe
Garnishes
Presentation is part of the fun with this Oreo No-Bake Cheesecake Cups Recipe. Freshly crushed Oreos or a swirl of whipped cream on top makes these cups look as delightful as they taste. You can also add a drizzle of chocolate or caramel sauce for an extra indulgent touch. And hey, a fresh mint leaf or a few chocolate shavings can turn these into miniature elegantly styled desserts!
Side Dishes
These cheesecake cups stand beautifully on their own as a luscious dessert, but if you want to build a themed treat table, pair them with fresh berries or a light fruit salad. The brightness and slight tartness of fresh fruit balance the richness perfectly, making the eating experience feel fresh and well-rounded.
Creative Ways to Present
Try layering the Oreo crumbs and cheesecake filling in clear glasses to show off those gorgeous layers. Use small mason jars or pretty dessert glasses to make them portable for parties or picnics. Or consider dipping the rims in melted chocolate and then crushed Oreos before adding the filling – a fun surprise in every bite that’s sure to wow your guests.
Make Ahead and Storage
Storing Leftovers
If you have any Oreo No-Bake Cheesecake Cups left, keep them covered tightly with plastic wrap or airtight lids in the refrigerator. They’ll stay fresh and creamy for about 3-4 days, which makes them a great make-ahead treat that practically tastes even better after a day or two.
Freezing
Wondering if you can freeze these cheesecake cups? Absolutely! Place them in an airtight container or cover each cup tightly, then freeze for up to 1 month. When you’re ready, thaw in the fridge overnight. The texture remains just as delicious, perfect for prepping desserts ahead of time.
Reheating
This dessert is best enjoyed cold, so avoid reheating. Just pop the frozen or refrigerated cups into the fridge for a few hours to let them soften naturally, and you’ll have that perfect creamy texture ready to enjoy.
FAQs
Can I use regular whipped cream instead of Cool Whip for this recipe?
Yes, you can substitute regular whipped cream, but be sure to whip it to stiff peaks and fold gently to maintain the light texture. The Cool Whip just adds convenience and stability, so homemade whipped cream works beautifully too.
How many Oreo cookies should I plan to buy?
The recipe calls for 24 to 26 Oreos, but it’s always a good idea to have a few extras on hand for topping and mixing, so grabbing a standard 36-count package will set you up nicely without worry.
Can I make this recipe gluten-free?
Definitely! Swap out regular Oreos for a gluten-free Oreo alternative or any gluten-free chocolate sandwich cookies. The rest of the ingredients are naturally gluten-free, so it’s easy to adapt while keeping all the delicious flavors intact.
Is it possible to make this recipe vegan?
This version isn’t vegan due to cream cheese and Cool Whip, but you can try using vegan cream cheese and dairy-free whipped topping alternatives. The flavor might vary slightly, but it’s a tasty option for those following a vegan lifestyle.
Can these cheesecake cups be made in larger quantities for a party?
Absolutely! Just multiply the ingredients accordingly, and either use larger containers or prepare multiple individual cups. They’re fantastic for parties because they serve as perfect single servings without the need for slicing or plating.
Final Thoughts
This Oreo No-Bake Cheesecake Cups Recipe is truly a showstopper when it comes to easy, crowd-pleasing desserts. It’s quick to make, uses affordable and simple ingredients, and delivers flavor and texture that keeps everyone coming back for more. Whether you’re serving it for a casual family treat or to impress guests, don’t hesitate to whip up a batch — your sweet cravings will thank you!
“`
Print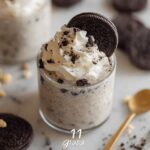
Oreo No-Bake Cheesecake Cups Recipe
- Prep Time: 15 minutes
- Cook Time: 0 minutes
- Total Time: 45 minutes
- Yield: 6 servings
- Category: Dessert
- Method: No-Cook
- Cuisine: American
- Diet: Vegetarian
Description
Delight in these easy and creamy Oreo No-Bake Cheesecake Cups, perfect for a quick dessert fix. This no-bake recipe combines crushed Oreo cookies with a luscious cream cheese filling whipped with powdered sugar and Cool Whip, layered into individual cups for a fun and simple treat. Ready in just 45 minutes with minimal effort, these cheesecake cups are sure to satisfy your sweet tooth.
Ingredients
Cheesecake Filling
- 1 8 oz block of cream cheese, softened
- 2/3 cup powdered sugar
- 1 teaspoon vanilla extract
- 8 oz Cool Whip or whipped topping
Crust and Topping
- 24–26 Oreo cookies (more as desired)
- Additional whipped cream for topping (optional)
Instructions
- Crush the Oreos: Place the Oreo cookies inside a sealed plastic bag. Using a rolling pin or sturdy wooden spoon, crush the cookies into small pieces. Spoon about 1 1/2 to 2 tablespoons of the crushed Oreos into the bottom of six small dessert cups or dishes (about 3/4 to 1 cup size). Set aside.
- Prepare the cheesecake filling: In a mixing bowl, combine the softened cream cheese and powdered sugar. Using a hand mixer or stand mixer, beat until the mixture is creamy and smooth. Add vanilla extract and mix to combine.
- Fold in Cool Whip and remaining Oreos: Gently fold in the Cool Whip to the cream cheese mixture until incorporated. Then fold in the remaining crushed Oreos, mixing gently to distribute evenly.
- Assemble the cups: Divide the cheesecake filling evenly among the prepared cups, gently pressing the filling on top of the crushed Oreo base to create a layered effect.
- Chill and serve: Refrigerate the cheesecake cups for about 1 hour or until firm and ready to serve. Before serving, optionally top with extra whipped cream and more crushed Oreos for garnish. Enjoy your no-bake Oreo cheesecake cups!
Notes
- Be sure to use softened cream cheese to ensure a smooth filling without lumps.
- The size of the dessert cups can vary but should hold between 3/4 cup to 1 cup for ideal layering.
- Chilling time can be extended up to 2 hours for a firmer cheesecake texture.
- You can substitute Cool Whip with any whipped topping of your choice or freshly whipped cream.
- For a less sweet version, reduce the powdered sugar slightly according to taste.
