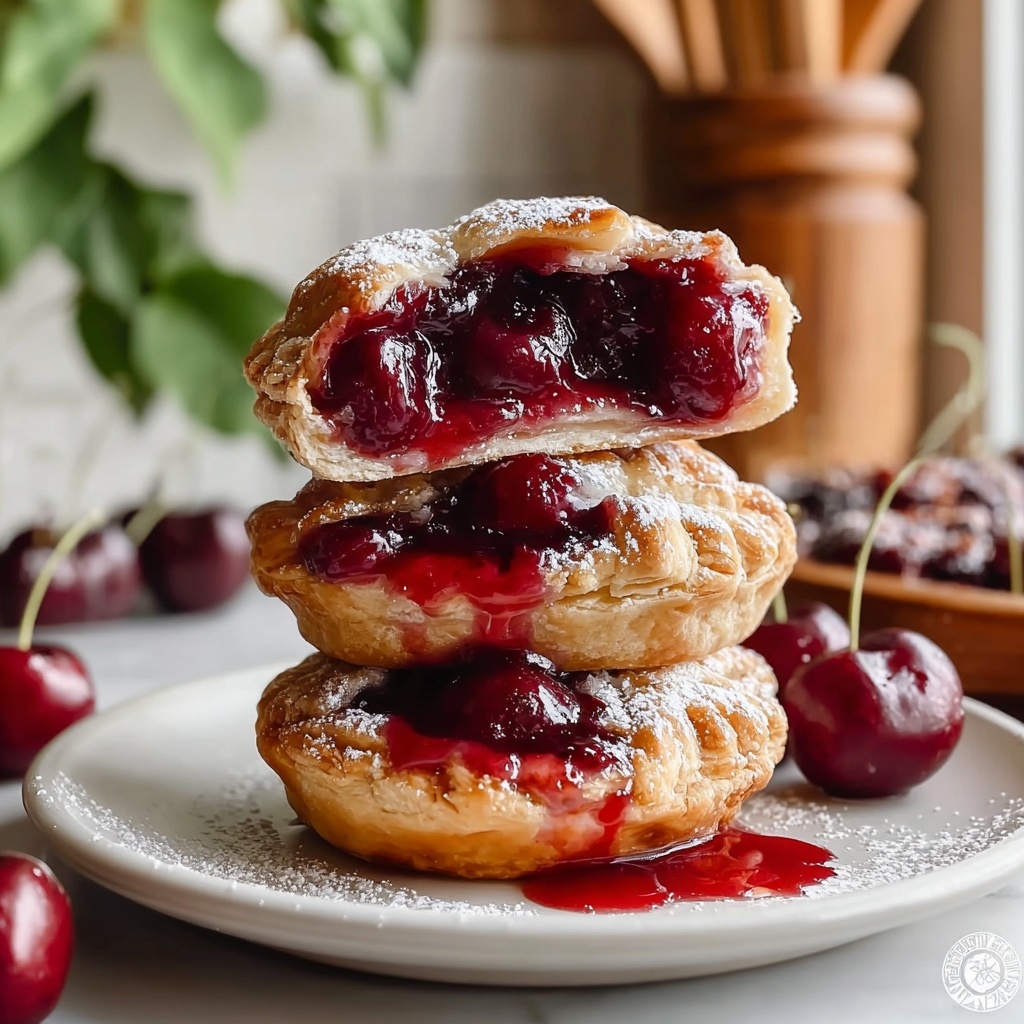
If you are in the mood for a delightful treat that bursts with juicy cherry goodness and flaky, buttery pastry, look no further than the Cherry Pie Bombs Recipe. This recipe takes the classic cherry pie flavors and transforms them into charming, bite-sized pockets of bliss that are as fun to make as they are to eat. Perfect for sharing with friends or enjoying as an indulgent snack, these Cherry Pie Bombs offer a perfect balance of sweet, tart, and crispy textures that will quickly become a favorite in your kitchen.
Ingredients You’ll Need
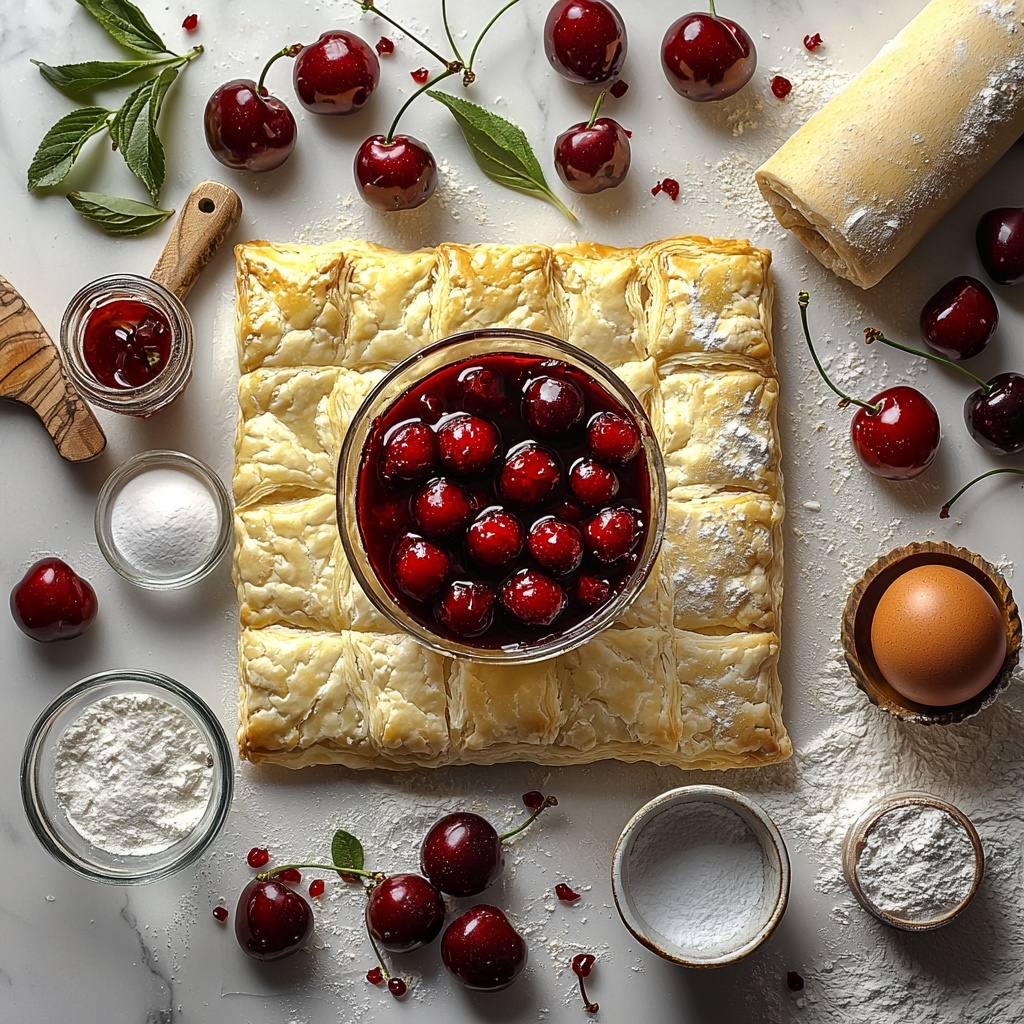
Each ingredient in this Cherry Pie Bombs Recipe is simple yet essential, playing a vital role to achieve the perfect texture and flavor. From the flaky puff pastry that envelops the cherry filling to the sugar and cornstarch that bring a luscious, glossy finish, every component contributes to the magic.
- Puff pastry sheet (thawed): The buttery, flaky base that crisps up beautifully when baked, creating that iconic light texture.
- Cherry filling (1 cup): Fresh or canned cherries bring the signature fruity burst, sweet and tangy all at once.
- Granulated sugar (1/4 cup): Sweetens the filling just right without overpowering the cherries’ natural tartness.
- Cornstarch (2 tablespoons): Thickens the cherry filling so it stays perfectly gooey without leaking during baking.
- Egg (for egg wash): Provides a gorgeous golden sheen and helps seal the pie bombs together.
- Powdered sugar (optional): Adds a delicate, snowy dusting for a lovely finishing touch and extra sweetness.
How to Make Cherry Pie Bombs Recipe
Step 1: Prepare the Puff Pastry
Begin by preheating your oven to 400°F (200°C). Roll out the thawed puff pastry on a lightly floured surface until it is about 1/8 inch thick. This ensures a delicate yet sturdy crust that bakes up golden and flaky.
Step 2: Mix the Cherry Filling
In a bowl, combine the cherry filling with the granulated sugar and cornstarch. Stir until everything is well mixed, creating a thick, sweet filling that will hold up nicely inside each pie bomb.
Step 3: Cut Out Pastry Circles
Use a round cutter or even the rim of a glass to cut circles from the rolled-out puff pastry. The size is up to you, but approx 3 to 4 inches in diameter works perfectly to create manageable, bite-sized pies.
Step 4: Fill and Seal
Spoon a small amount of the cherry filling onto the center of each pastry circle. Fold each circle in half, gently pressing the edges together to seal. For a charming touch and extra security, use the tines of a fork to crimp the edges all around.
Step 5: Bake to Perfection
Place the sealed cherry pie bombs on a baking sheet lined with parchment paper. Brush each one with the beaten egg to give a beautiful shine as they bake. Pop them into the oven and bake for 15 to 20 minutes, until they are puffed up and golden brown.
Step 6: Cool and Dust
Allow the Cherry Pie Bombs to cool slightly before dusting them with powdered sugar if you like a little extra sweetness and an elegant finish.
How to Serve Cherry Pie Bombs Recipe
Garnishes
To elevate your Cherry Pie Bombs, consider adding a light dusting of powdered sugar just before serving. Fresh mint leaves or a drizzle of warm vanilla sauce can also add a beautiful contrast and extra flavor dimension.
Side Dishes
This recipe is delightfully versatile and pairs wonderfully with a scoop of vanilla ice cream or a dollop of whipped cream for a classic dessert experience. A cup of hot coffee or tea also complements the flaky, fruity pies perfectly.
Creative Ways to Present
For a fun party presentation, arrange the Cherry Pie Bombs on a festive platter with fresh cherries scattered around. You can also serve them in mini cupcake liners or colorful paper cups to make each bite feel special and easy to grab.
Make Ahead and Storage
Storing Leftovers
If you have any Cherry Pie Bombs left after the party, store them in an airtight container at room temperature for up to two days. This keeps the pastry crisp and the filling deliciously fresh.
Freezing
These pie bombs freeze beautifully. Arrange unbaked bombs on a baking sheet, freeze until solid, then transfer to a freezer-safe bag or container. When ready to enjoy, bake them straight from the freezer, adding a few extra minutes to the bake time.
Reheating
To bring back that fresh-baked magic, reheat leftover or frozen-and-baked Cherry Pie Bombs in a 350°F oven for about 5 to 7 minutes. This warms the filling and crisps the pastry so they taste just as good as the first time.
FAQs
Can I use fresh cherries instead of canned?
Absolutely! Fresh cherries make a wonderfully vibrant filling, just be sure to pit and chop them before mixing. You might need to adjust the sugar slightly depending on their sweetness.
What if I don’t have puff pastry?
Puff pastry is key to the light, flaky texture, but you can experiment with pie dough or crescent roll dough for a different take, though results will vary in flakiness and rise.
How do I prevent the filling from leaking?
Make sure not to overfill each pie bomb, and be thorough when sealing the edges. Using a fork to crimp the edges helps create a good seal to keep that sticky sweet filling inside.
Can I make these gluten-free?
Yes, look for gluten-free puff pastry options in your grocery store or specialty markets. The rest of the ingredients are naturally gluten-free, making this recipe adaptable.
What is the best way to serve these warm?
Serve the Cherry Pie Bombs fresh from the oven or gently reheated with a scoop of ice cream or whipped cream to contrast the warm, flaky pastry with cool, creamy goodness.
Final Thoughts
These Cherry Pie Bombs Recipe are pure joy wrapped in pastry. They bring together the classic flavors of cherry pie with a fun, bite-sized twist that’s sure to impress your family and friends. Whether you’re making them for a special occasion or just because, these pie bombs are destined to become a beloved staple in your dessert rotation. So grab your puff pastry and cherries, and get ready to delight your taste buds!
Print
Cherry Pie Bombs Recipe
- Prep Time: 15 minutes
- Cook Time: 20 minutes
- Total Time: 35 minutes
- Yield: 8 servings
- Category: Dessert
- Method: Baking
- Cuisine: American
Description
Delightful Cherry Pie Bombs featuring flaky puff pastry filled with sweet cherry filling, baked to golden perfection and lightly dusted with powdered sugar. Perfect for a quick dessert or snack that bursts with fruity flavor in every bite.
Ingredients
Puff Pastry
- 1 sheet puff pastry (thawed)
Cherry Filling
- 1 cup cherry filling (fresh or canned)
- 1/4 cup granulated sugar
- 2 tablespoons cornstarch
Finishing
- 1 egg (for egg wash)
- Powdered sugar (for dusting, optional)
Instructions
- Preheat Oven and Prepare Puff Pastry: Preheat your oven to 400°F (200°C). Lightly flour your work surface and roll out the thawed puff pastry sheet until it reaches about 1/8 inch thickness, ensuring an even layer for wrapping the filling.
- Make Cherry Filling: In a mixing bowl, combine the cherry filling with granulated sugar and cornstarch. Stir well until all ingredients are thoroughly blended, ensuring the filling will thicken nicely during baking.
- Cut Pastry Circles: Using a round cutter or a glass, cut out circles from the rolled puff pastry. The size of the cutter should be sufficient to hold a spoonful of filling and fold over comfortably.
- Fill and Seal Pie Bombs: Place a small spoonful of the cherry mixture into the center of each pastry circle. Fold each circle in half to encase the filling, pinching the edges firmly to seal. Use a fork to crimp the edges decoratively, which also helps prevent opening while baking.
- Prepare for Baking: Arrange the filled pastry bombs on a baking sheet lined with parchment paper. Brush the tops with beaten egg to give them a shiny, golden finish when baked.
- Bake: Bake in the preheated oven for 15-20 minutes or until the pastry is puffed up and golden brown all over.
- Cool and Dust: Let the Cherry Pie Bombs cool slightly on a wire rack. Before serving, dust the tops lightly with powdered sugar if desired for an extra touch of sweetness and presentation.
Notes
- Use fresh or canned cherries, ensuring they are well-drained if using canned to avoid soggy pastry.
- Chilling the assembled pie bombs in the fridge for 10 minutes before baking can help maintain their shape and crispness.
- For a vegan option, substitute the egg wash with almond milk or another plant-based milk.
- Serve warm with a scoop of vanilla ice cream for an indulgent treat.


